Monday, September 29, 2014

Texture


For this assignment we had to take pictures with texture. This means it has a certain feel to it.


Texture Photograph 1


This picture has a texture that's kind of rough. It's almost as if you can see how it feels. The angle was straight so the image focused on the texture of that streak that's in the middle of the tree bark.


Texture Photograph 2


This photo was similarly taken of a tree like the photo above, however it is a different tree and the angle of how the photo was taken is different. It was taken from below and and angled to the top.


Texture Photograph 3


This photo was taken of the cap of a sewer opening. The angle makes it look like it has depth, it looks like it is continuing to the top. I edited so that the contrast and brightness would look unique as well as abstract, the colors have silver as well as other colors involved. The texture involves the actual squares as well as the ground next to the squares.


Texture Photograph 4


This photo was taken of a wall outside, you can see the texture of the wall with the lines on the wall. You can see the texture which is rough. You can see a small angle as it goes up to the right corner.


Texture Photograph 5


This photo was captured to show the texture of the leaves. The lines on the leaves show the texture of the leaves.


Texture Photograph 6


This photo was taken of a roof which has many different textures. It captures just the important aspects of the photo and this could be anything because of the pattern, the texture, and the subject of the photo.

Macro Photography


For this assignment I was to take 2 macro photographs. Macro photos are pictures that are focused on something small and the detail on that some object is present. On most cameras there is a setting called macro which helps zoom in and focus on tiny details and this setting was used for these photographs below. Cameras have a setting called macro. The setting helps the details in small objects more visible and focus on the tiny details. The macro setting was used and turned on during the taking of these pictures.

Color Macro Photograph


This macro photo is a picture of my braids on a surface. The color of the background was edited to have a bit more contrast between the braids and the table. The macro setting was used to capture the smallest detail in the detail.


Black & White Macro Photograph


This macro photo is a picture of a ring. I chose black and white because of the color of the ring. The ring is silver and when the color of the photo is black and white I really liked the blend of the grey and silver as it's a good combination. To capture the really small bits of detail I used the macro setting  on the camera.

Blurry Photography


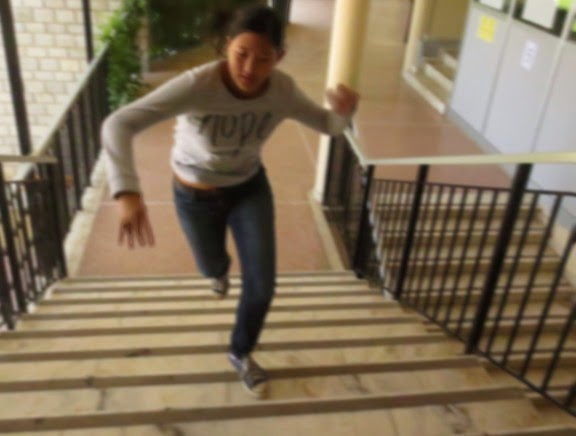
For this assignment I was to taken a blurry photo and to take a photo that was not blurry and to make it blurry.

Blurry Taken Photo

This picture was taken as a blurry photo and edited to give more contrast and the brightness of the colors it has right now. It was taken in color and remained in color during editing. To get the blurry effect I got my friend to spin around a pole and I took continuous shots. I then chose the best one that was blurry. To make sure it would be blurry and not clear like the stop action I made the ISO speed really low to 100.


Photo Edited to Appear Blurry

This picture was originally a still taken photo and I had edited this picture to seem blurry. I used a technique similar to the ones used in stop action. The ISO speed set to 3200 so the picture wouldn't be blurry and in color. I then edited so that it would be blurry.

StopAction Photography


This assignment involved taking stop action photography. Stop Action is when you take a photo that captures a moment in time in the middle of some action. The requirements of this assignment were only to take 2 photos and my final ones are below. In order to take good and clear stop action photography setting the ISO speed higher to what it normally is helps you get a good clear picture with fast movement. With this setting on the camera I was able to take good clear pictures of action. For these pictures the ISO speed to on 3200.

StopAction, Color

This picture was taken to capture the moment of a person swinging from a pole. I took this picture in color and had an ISO speed of 3200 to have a clear stop action photo.

StopAction with Sepia Color


This picture was taken to capture the moment of person doing a cartwheel. This picture was originally taken in color with an ISO speed of 3200 but during edited I decided to change the color to sepia.


Portraits


This was the first assignment of the semester and what was required of us was to take 4 portraits of our classmates. 1 must but sepia, 1 must be color, and 2 must be black and white. Along with this 1 of the photos had to be a close-up, a partial, an angle photo, and a full photograph. In order to get the different colors I had different settings for color for each of the photographs.

Sepia Close-Up

This portrait is a close-up meaning in zooms in on a certain aspect of the face and in this case are the eyes.  I changed the setting on the camera to sepia to get the sepia color look.


Black & White Partial

This picture is also a portrait but was taken in black and white. To get black and white I changed the setting on the camera. This picture only has a partial of the her face. I edited this photo to add more contrast meaning the colors were contrasting more so you can see things more clearly, you can clearly see the difference from the face and the hair.


Color Angle Photograph


This photograph was taken so that it would be in color and has an angle to it, I did not change any settings on the camera because on the normal settings the camera shows color. An angle photograph means the way you see the photograph and how it was taken was not parallel to you eye sight but has a certain angle. Angle photographs can have some of the face or the whole face, in this picture you can see the whole face but that's not the focus of this photo. The focus is the angle.


Black & White Full 

Now a full portrait means it is the full and the whole of the face like this picture. You can see the entire face unlike a partial or a close-up. This picture was taken with the setting of black and white on the camera with the whole of the face, or full face.